 Mister Sowerby … One chap’s adventures in vintage and retro. Me mam says it’s old tat…
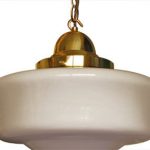
Amidst one of my periodic bouts of mirthless ennui, I somehow ended up in possession of a Carn studio pottery lamp base, purchased ostensibly to give me a task to keep me away from the malt and mental mire.
Requisite elements purchased, tools at the ready, I could have completed the task of wiring the beast many times in weeks prior. But I delayed, it being my nature as a bottomless sack of generosity to make good on this opportunity to furnish enlightenment. Thus, you sordid ravishing wolves will now receive a blow-by-blow account of Mister Sowerby’s lamp wiring process. I may in moments, slip into technical terms that appear at first confusing. Worry not, for the accompanying illustrations will illuminate your reluctant conscience.
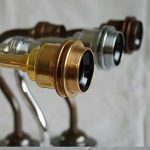
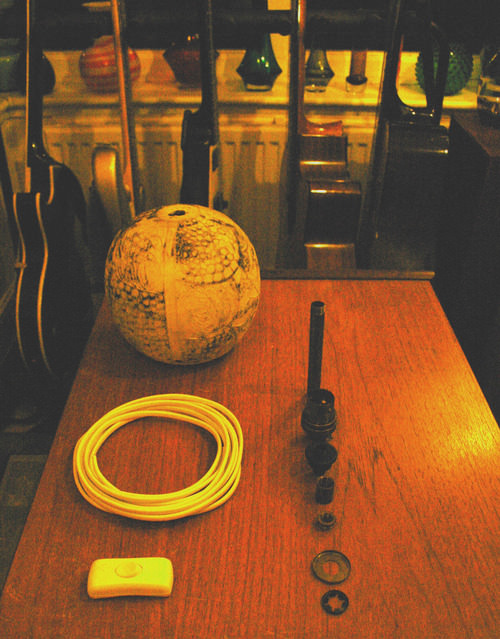 Step 1. Assemble the giblets.
You will note that in addition to the previously noted lamp base, we have flex, a torpedo switch, the lamp flange, scrumpers and caps, a rubber scone and a flex trumpet. These will fit together with the aid of tools, hands and brute force to coax photonic mastery over the electroids.
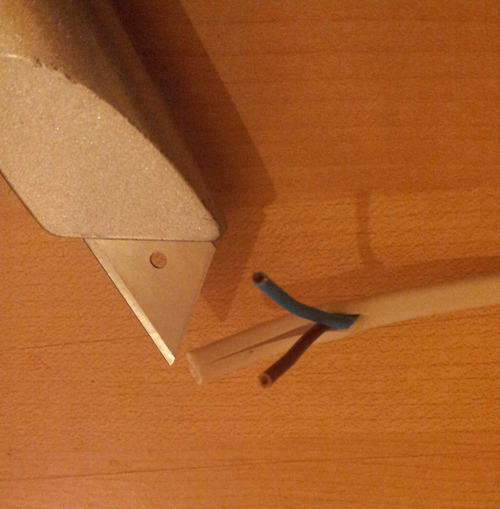
Step 2. Exposing the flex.
To achieve exposure of the flex, one requires two tin birds, one to open the outer garment of the flex., the second to strip off the undercovers. Once stripped, twist the end of the flex to produce a satisfying nub that is ready for insertion into the lamp flange.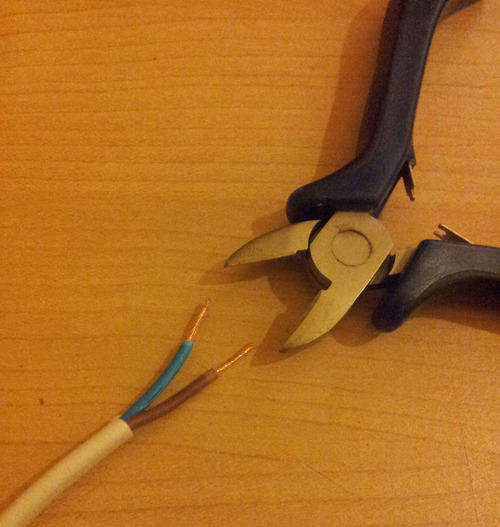
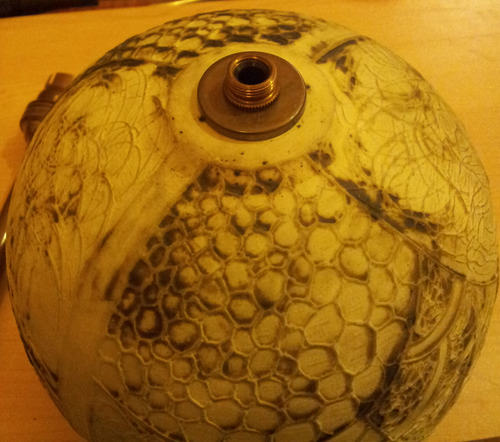
Step 3. Undressing and re-dressing the lamp flange.
The lamp flange is prepared by removal of the upper jacket and the lower skirt. When the inner flange is revealed, push the nubbined flex through the lower skirt and into the inner flange. 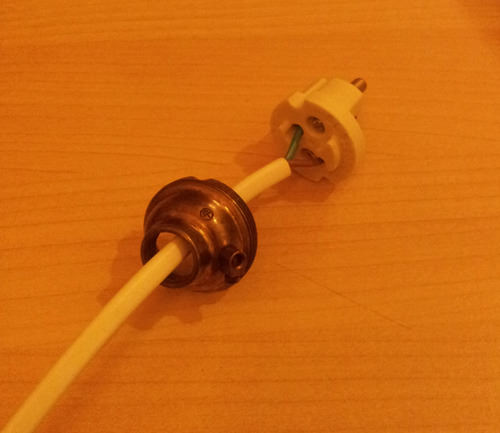 Enunciate the screw for each nubbin. Upon full screw enunciation, the flange may be re-dressed with the upper jacket.
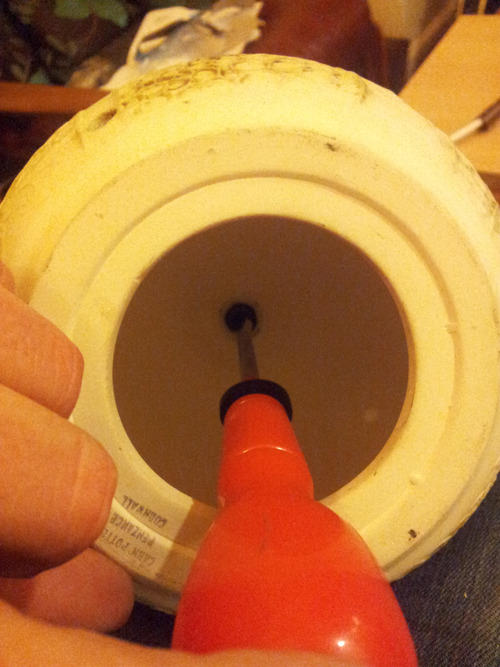
Step 4. Attaching the rubber scone and scrumpers.
Insert the chief scrumper into the upper orifice of the lampbase. The rubber scone needs to be inserted onto the reverse of the chief scrumper, that end which is now within the lamp base. This may prove awkward if the lower orifice is narrow, but can be overcome by threading the scone onto a screwdriver and allowing it to slide onto the scrumper (illustrated below). A crimp scrumper can then be attached to hold the scone in place using the same method. Revise one’s view to the outer lamp base and fit the scrumper cap.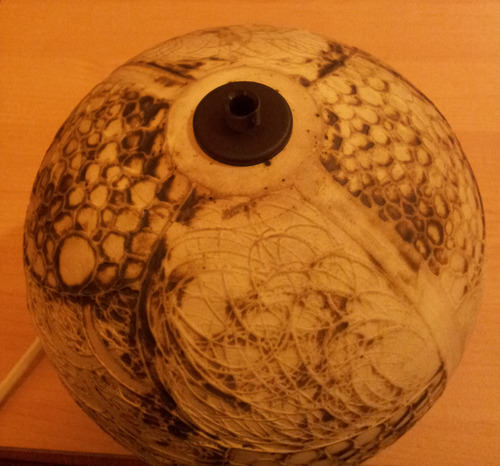
 Step 5. Affixing the flex trumpet.
It is at this point I appear to have neglected the illustrative element of this guide. No matter. The flex trumpet is merely a metal tube which screws at both ends. Feed the flex through the trumpet and screw the trumpet to the lamp flange. Feed the flex through the scrumper cap and into the lamp base. Screw the other end of the trumpet onto the scrumper cap. It’s very straightforward. One really shouldn’t have any problem with this stage, having made it thus far.
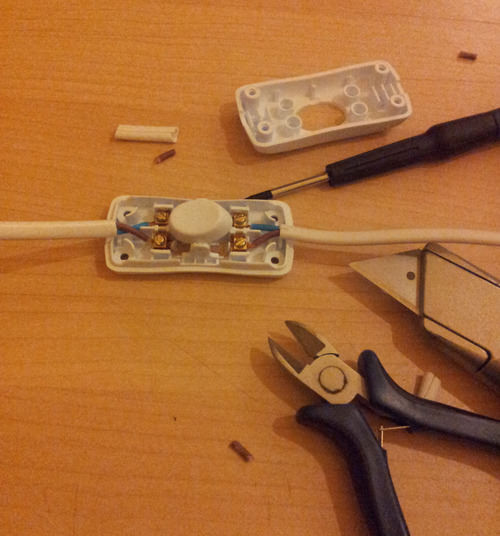 Step 6. Fitting the torpedo switch.
This stage is really a repeat of steps two and three. Push the flex through the lamp base’s exit orifice. At a point where one feels is suitable for the torpedo switch to reside, use the tin birds to separate the flex and create more nubbins. The nubbins will require insertion into the switch and screws enunciated. Ensure each nubbin sleeve matches so as not to reverse the polarity. Upon full enunciation, the switch casing can be relapsed. It is important to note at this juncture that the torpedo switch does not actually launch torpedos.
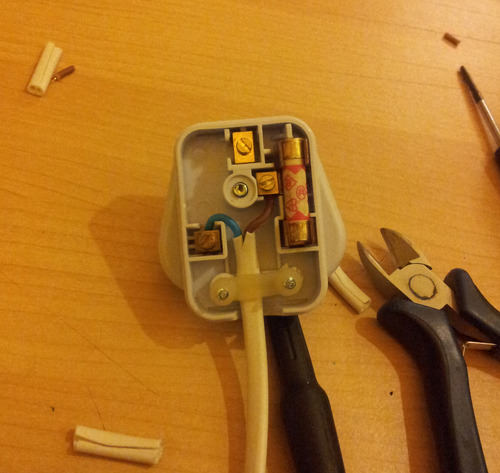 Step 7. Plug fixation and lighting up.
It’s vital to check first that one has the right kind of plug and not assume that the plug shaped thing in one’s tool box is actually fit for purpose, this may not always be the case. Fitting the plug requires further nubbin enunciation, to which I shall not insult your intellect by explaining again how this works.
Once affixed, the plug can be set in a socket, to bathe the room in the radiant glow of one’s efforts, assuming of course one has a sweet bulb to hand.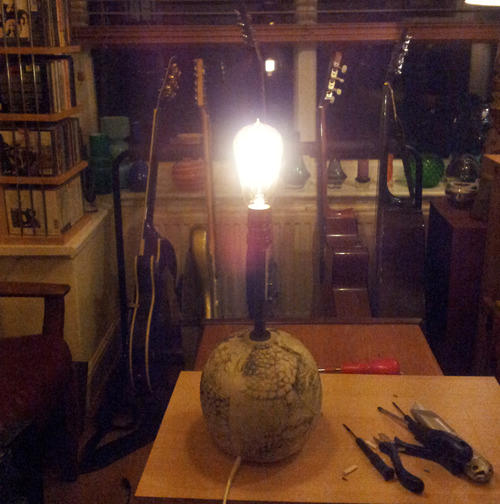 And that’s how Mister Sowerby wires a lamp. Now, my nameless terrors of ecstasy, go forth, be plentiful in your gifts and don’t p**y about with electricity ;)
Parts were purchased from a variety of sources hardware stores with the more specialist items from lampsandlights.co.uk.
IMPORTANT NOTICE. YOU SHOULD KNOW THAT ELECTRICITY IS A DANGEROUS BUSINESS AND YOU SHOULD NOT ATTEMPT TO DO ANYTHING WITH IT IF YOU ARE NOT A GROWN UP OR A COMPETENT HUMAN BEING. YOU SHOULDN’T BE LOOKING AT ANY OF THE ABOVE AS A TRAINING MANUAL FOR YOU. IT IS NOT.
Is is with much appreciation from Mr Sowerby for allowing us to re-post his superb blog from his ever funny and fantastical www.mistersowerby.tumblr.com.


Leave A Comment